Hello and welcome back! Today I want to talk about how you can take professional photos at home! Because I unfortunately can’t be there for all of your family vacations and victories, this guide should give you everything you need to document all of life’s little moments! Of course there will be multiple blog posts on this subject because it would end up being waaaaaaayyyyyy too long if I tried to fit all of it in one post so this one will be dedicated to beginners equipment.
Best beginners photography equipment
- Camera
- Lenses
- Camera bag
- Memory cards
- Tripod
- Filters
- Flash
- Extra batteries
- Editing software
Best beginners cameras
First, let’s talk a little bit about the main types of cameras that are out on the market. First we have point and shoot cameras.
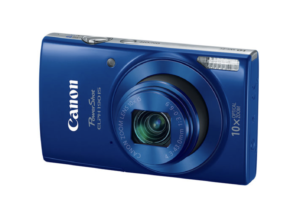
Most of us have probably owned a camera similar to this at some point in our lives. The name is as it suggests- you simply point it at your subject and shoot. Easy peasy. These cameras however are basically the same thing that everyone has on their phones. No changing lenses or creative control. If you want to take professional photos at home, this camera might not be able to get you the results that you’re hoping for.
The next type of camera is the DSLR.
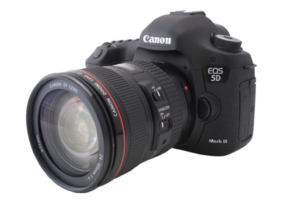
This is the type of camera that I currently have and love! DSLR stands for digital single lens reflex. Without getting too technical, this type of camera works by using a reflex mirror to reflect light into the optical viewfinder. This type of camera has the ability to change lenses and shoot in manual mode for great creative control! However, the camera industry is beginning to move towards the use of a new type of camera which means that it may soon be more difficult to find accessories for a DSLR.
The third common camera type is an SLR or film camera.
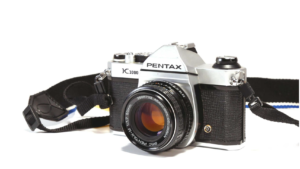
This type of camera works similarly to DLSRs but uses film instead of memory cards. I don’t recommend this type of camera for beginners for a few reasons. There is no way to preview your images which means that as a beginner, you’ll most likely spend a pretty penny on film with few usable frames. Developing your photos may prove to be another obstacle since public dark rooms are becoming more scarce.
The last main type of camera is the mirrorless camera.
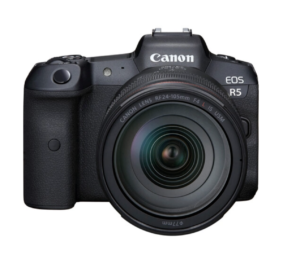
This is the type of camera that the industry is beginning to move toward and will be my next camera! Mirrorless cameras work without the use of a mirror. Because of this, mirrorless cameras use electronic viewfinders. Like DLSRs, you have the ability to change lenses and shoot in manual mode for the greatest creative control. Check out this list of best beginners mirrorless cameras here: https://www.techradar.com/news/best-entry-level-mirrorless-camera
Lenses
You may have heard the phrase “put your money into glass”. Lenses are going to be THE most important pieces of equipment in your bag. Besides your camera settings, lenses are going to have the biggest effect on your overall images. There are 2 main types of lenses- prime and zoom.
A prime lens just means that the focal length is fixed and you can’t zoom in or out. The overall quality of the image is almost always better when shooting with a prime lens. Prime lenses tend to be lighter, more affordable and offer better sharpness, low light performance and shallow depth of field than its zoom counterparts. The 50mm is, in my opinion, THE most important lens for a beginner photographer to own.
Zoom lenses offer great versatility, especially in tight spaces but can be heavy and expensive. The most popular zoom lens for beginners is the 24-70mm. This lens gives the ability to shoot in tight spaces or to zoom out and capture wide images.
Macro, wide angle, telephoto, oh my!
A macro lens is just a lens that can focus super up close and fill the frame with a tiny subject.

My all time favorite macro lens is the Canon 100mm 2.8. The 2.8 refers to the maximum aperture (future blog!). If you’re planning on taking photos of your kiddos, this is a really cool lens for getting detail shots but I would say that it’s more of a want than a need for a beginner.
Wide angle lenses are any lens with a short focal length and wide field of view. Any lens with a focal length of 35mm or wider (a number lower than 35) is considered a wide angle lens.
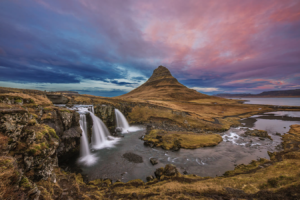
Wide angles are great for epic landscape shots. This lens type tends to create distortion at the edges of the frame which may not be the best choice for portraits.
Telephoto is a general term to describe focal lengths that create a narrow field of view beyond 80mm. In simple terms, it makes things that are far away look like they’re right in front of you.
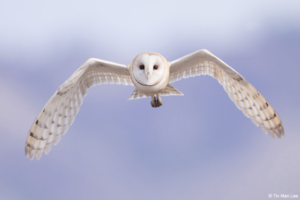
This type of lens is great for wildlife but it can also be amazing for taking candids of your kids while they play!
Camera bags
Amazon has some amazing and affordable camera bags! You want something sturdy and secure that will hold all of your most used equipment. Bonus if it’s cute! Click here to see my favorite!
Memory cards
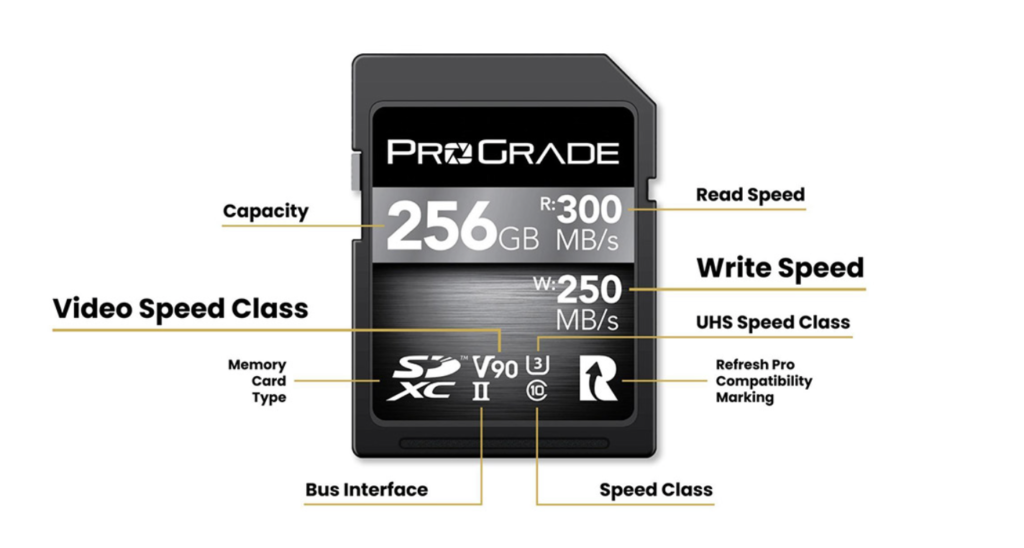
Before selecting a memory card, make sure that it’s compatible with the camera that you choose! From there, you’ll want to select a card with at least 32GB of storage. The speed of the card is extremely important. If your baby is taking her first steps, you want your memory card to be up to the job! A slow memory card can mean missing once in a lifetime moments!
Tripods
When you think of a photographer, you might picture someone with their camera on a tripod pointed towards a group of people. The truth is, you won’t actually need a tripod in most situations if you’re just doing portraits. The exception would be in the case of remote photography if say, your entire family is in town and you’d like to be in the photos with them. In that case, you want to find a tripod that is light enough to carry but sturdy enough to stay put in different terrain. This is my current favorite!
Filters
Again, as a beginner portrait photographer, these aren’t a necessity. Most filters work by either altering color or by darkening your image (we’ll get more into this in later blogs). I do however recommend clear filters. They won’t change your images but they offer excellent protection for the glass on your new equipment!
Flash
Although some beginners cameras come with built-in flash, it’s almost never a flattering look. Instead, I highly recommend a speedlight. Once again, you’ll want to make sure that whichever light you choose is compatible with your camera. Speedlights can either be mounted directly to your camera or to a light stand for more dimensional lighting.
Extra batteries
I cannot stress this one enough! Extra AA batteries and camera batteries are an absolute must! You’ll save yourself tons of money by investing in rechargeable batteries from the beginning.
Post processing software
No matter how amazing you photos are, RAW photos will require editing to look their very best. Adobe has the best post processing software on the market at affordable monthly rates. You may have heard of Photoshop but Lightroom is what you will be using most frequently. Unless you’re interested in highly edited photos (think adding unicorns), you probably won’t ever need Photoshop.
Conclusion
It might be tempting to purchase a camera kit that includes everything you need but I encourage you to make you purchases separately after doing your own research on each. I’m so excited to help you start your very own photography journey! Stay tuned for more tips coming soon!
Until next time,
Randi Idelle
Apr 9, 2022
How to take professional photos at home
