Hello again and welcome to how to take professional photos at home part 2! if you missed part 1, be sure to check that one out first. Today I’m going to teach you about the exposure triangle. Trust me, it’s less scary than it sounds!
There are 3 parts that go into creating a correctly exposed image but first, what is exposure?
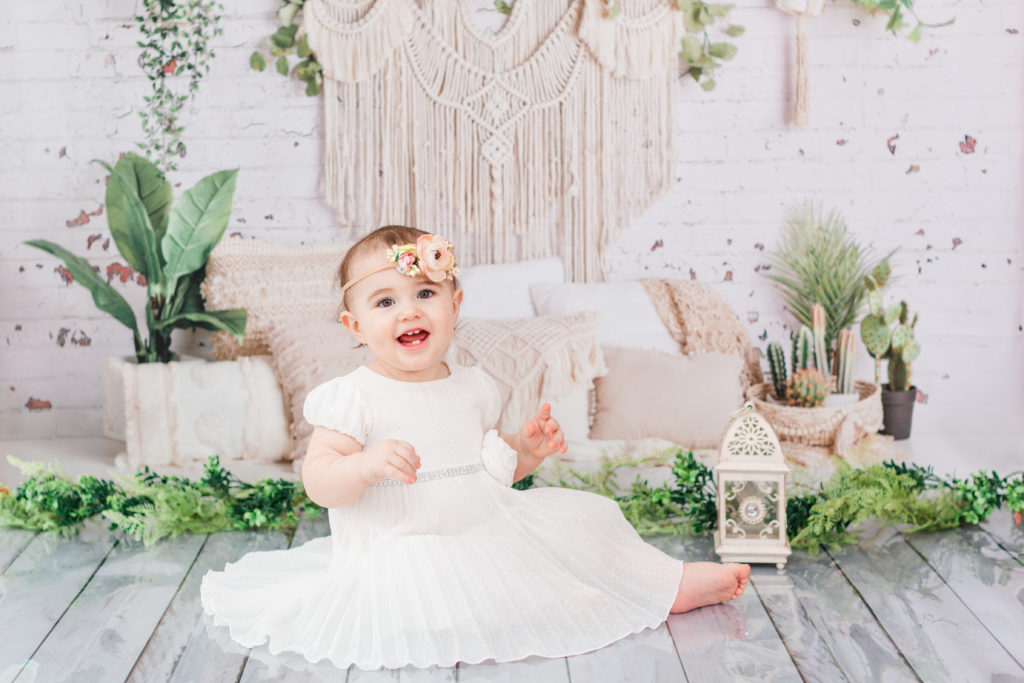
You can buy this super cute backdrop here!
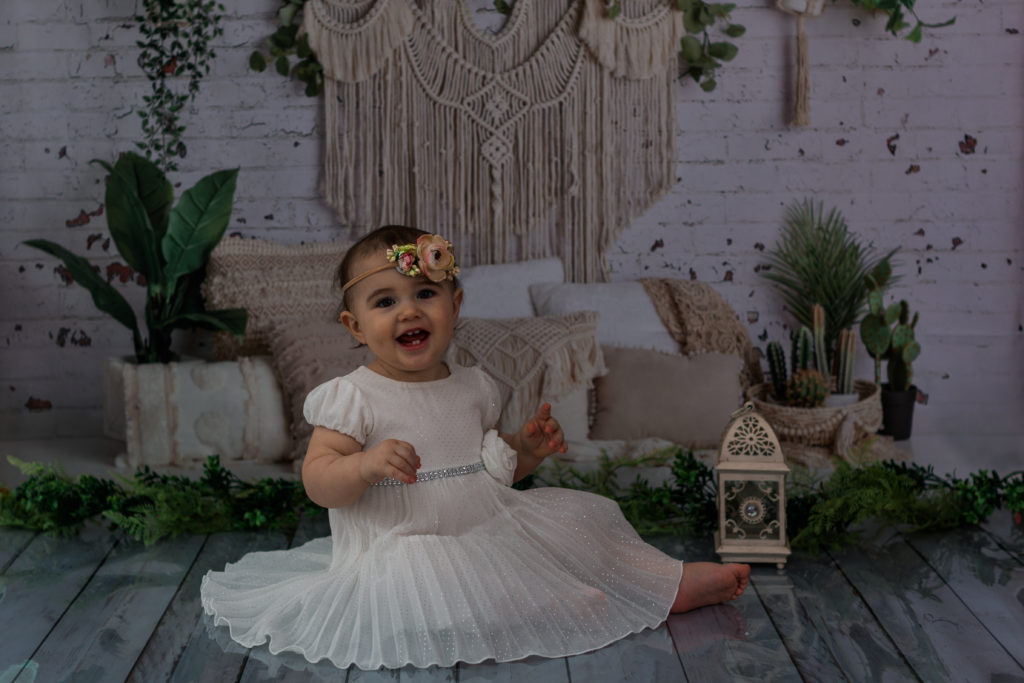
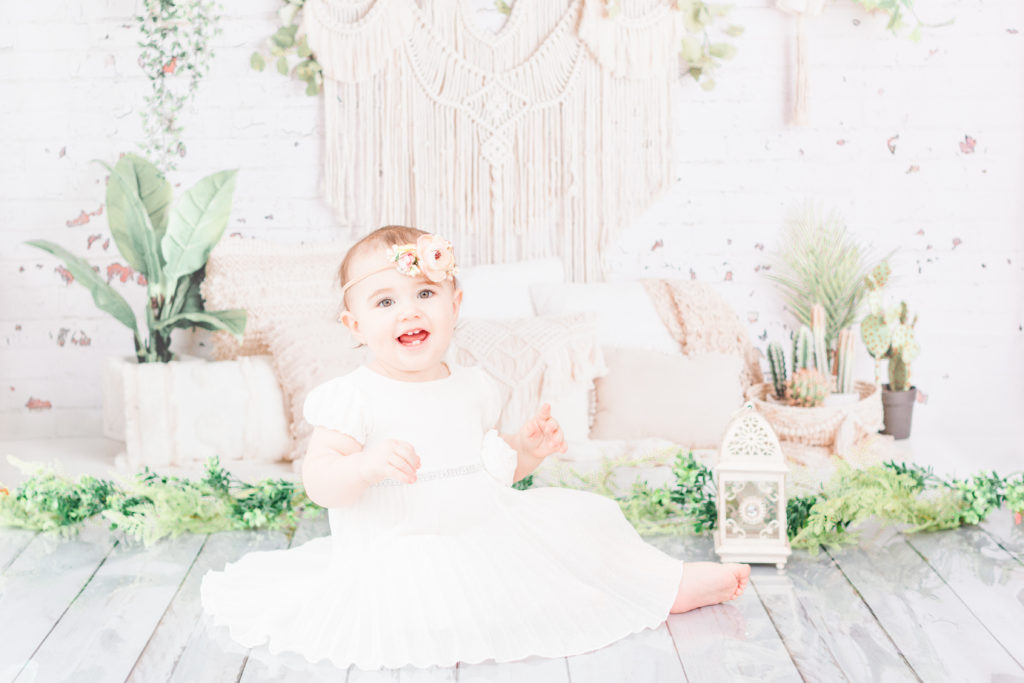
The image on the left is underexposed. This means that the photo is so dark that it loses detail in the shadows. The image on the right is overexposed which means that the photo is so bright that it loses detail in the highlights. There is a little bit of wiggle room between the two and that’s where your own personal style will come in! I personally prefer my photos to be just a hair above “correct” exposure but there are no wrong answers!
Light meter
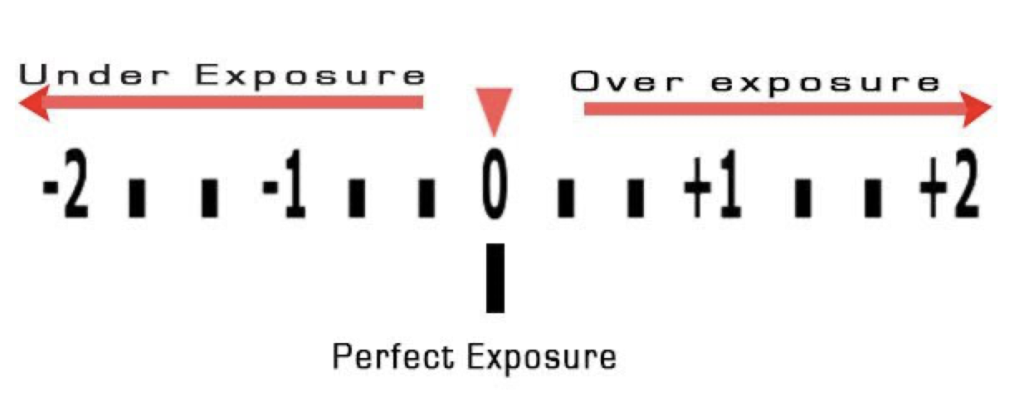
When you look through the viewfinder of your camera you’ll see a viewfinder like the one below. The goal is to use all 3 of the following elements to balance your meter at 0 for a perfect exposure.
Aperture
Aperture is a hole in the lens through which light enters the camera body. The same way that our pupils dilate to let in more light, the wider your aperture, the more light is let in.
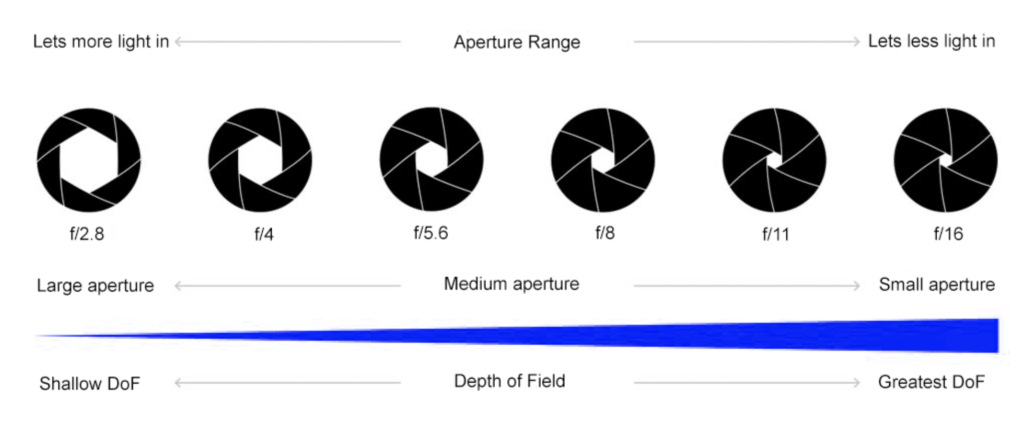
The width of the aperture is specified in F-numbers such as F / 8. A small number such as f / 1.8 means wide aperture, while a large number such as f / 22 means narrow aperture. As you can see in the above chart, the smaller the f stop, the larger the hole and the more light is let in. The larger the f stop, the smaller the hole and the less light is let in.
Not only does aperture effect the exposure, it has another purpose. Aperture also controls your depth of field.
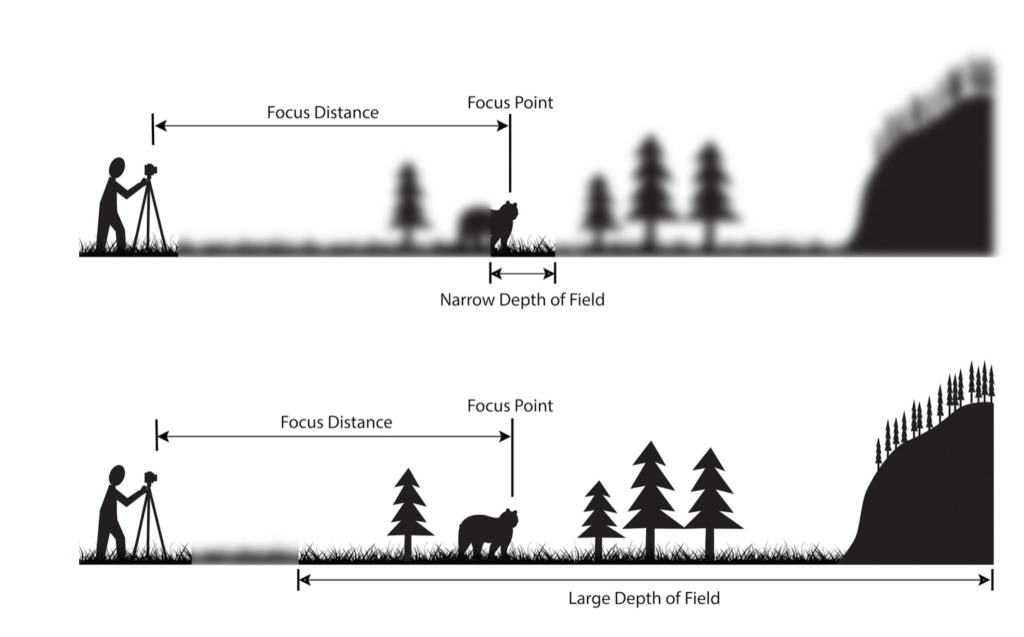
Depth of field is the distance between the closest and farthest objects in a photo that appears acceptably sharp. The goal is usually to have your subject in sharp focus and the background behind them nice and blurry. This will make your subject “pop” off your background and stand out in the photo.
ISO
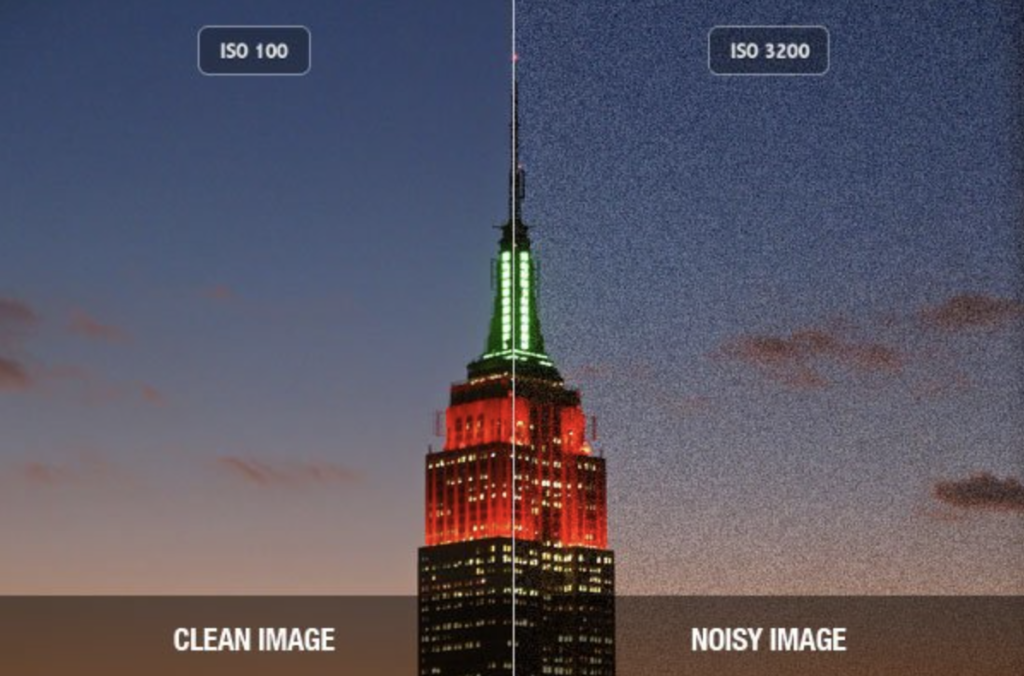
ISO is your camera’s sensitivity to light. A lower ISO value means less sensitivity to light, while a higher ISO means more sensitivity. On a bright sunny day, an ISO of 100 is usually perfect but on a cloudy day you may need closer to 1600. Like aperture, ISO can have another effect on photos. The higher your ISO, the more noise will be in your images. Image noise can be defined as appearance of undesired traces and variations in the brightness or color of your image. These random imperfections make your image grainy, thus affecting its quality. You can remove some noise with post processing software such as Lightroom or Topaz Labs but it’s always best to try to avoid noise during shooting by using a lower ISO.
Shutter speed
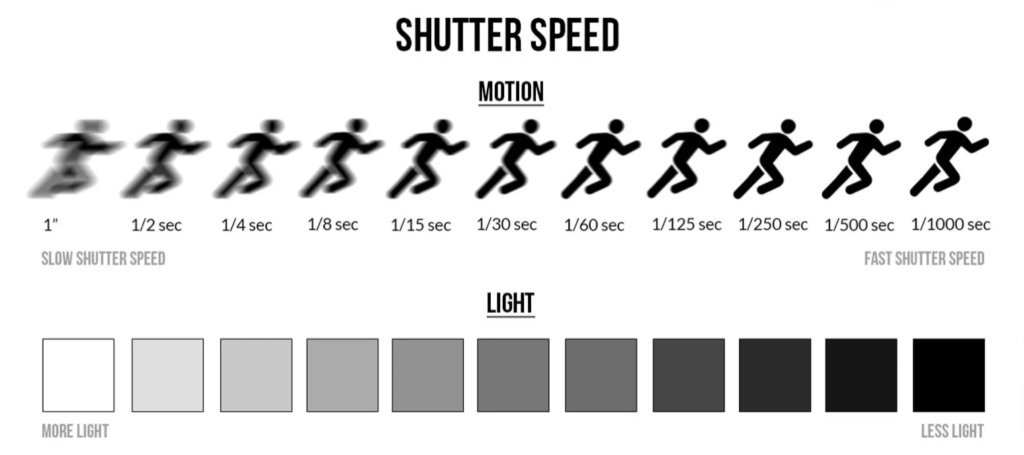
Shutter speed is simply the speed at which your shutter opens and closes. The longer your shutter is open, the more light is let in. The quicker you shutter, the darker your image. Like aperture and ISO, shutter speed has another effect. A longer shutter speed means that any movement that happens while the shutter is open will be recorded. In simpler terms, your images will be blurry if the shutter is open too long. As a general rule, your shutter speed should be at least double the focal length of your lens. For example, if you have a 50mm lens, your minimum shutter speed should be 1/100. If you’re taking photos of your kiddos while they’re running around, you might need a shutter speed of 1/500 or higher to avoid blur.
Putting it all together
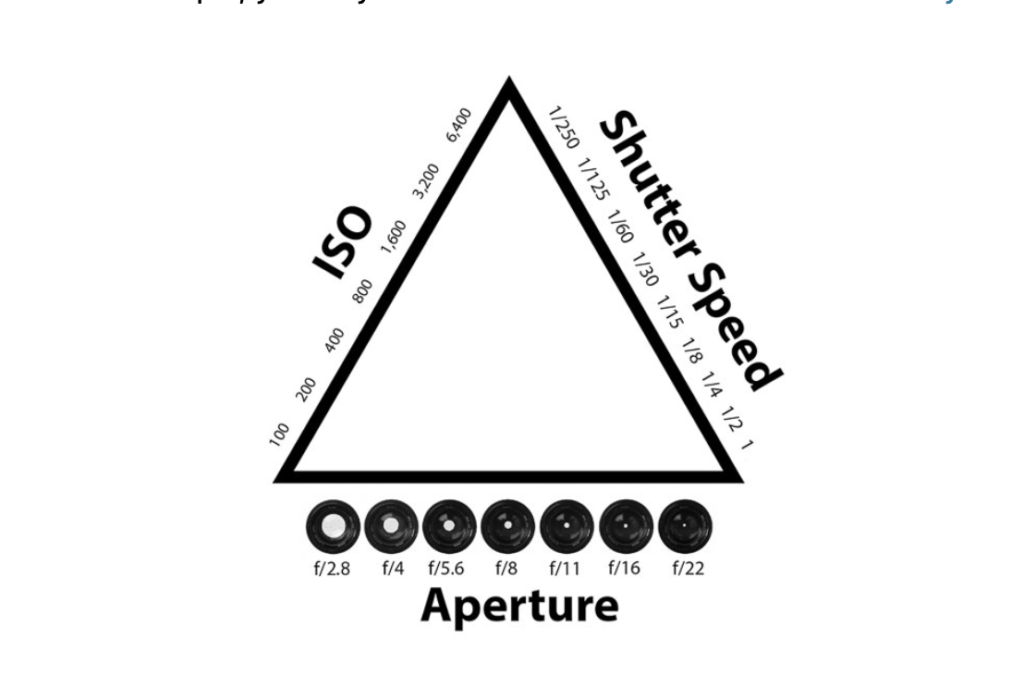
So which setting should you set first? Technically speaking, there is no wrong answer as long your exposure is correct. This is where you have a lot of artistic freedom! Personally, I like to set my aperture first. Depending on how many people I will be photographing, I will use around f/2.8 for 1-2 people and up to f/4 for families of 5-6. I like to keep my aperture as low as possible so that the background is blurry but all of my subjects are in sharp focus. From there, shutter speed is my next priority. Like I mentioned, your shutter speed needs to be at least double your focal length but let’s take that a step farther. If your subjects will be moving, you’ll want a faster shutter speed. Through a little bit of trial and error this part will become second nature. Lastly, you will want your ISO to balance out your light meter.
Examples
Picture a bright, sunny day, your subject is a teenager and you’re using a 50mm lens. Your camera settings will probably look something like this: aperture f/2.8 shutter speed 1/1000 ISO 100. The shutter speed could be lower if it were a cloudy day but on sunny days, you may need to really crank up your shutter to get a correct exposure.
It’s a cold day with dense clouds, your subject is a toddler and you’re using an 85mm lens. Your camera settings today will be closer to this: aperture f/2.8 shutter speed 1/250 ISO 1600. In this example, you’ll still want that same depth of field but your subject will move more than a teenager and your minimum shutter speed has to be double 85. If you bump it up a little bit to account for a toddlers movement, 1/250 should do the trick! Since it’s a darker day you’ll also need to bump up your ISO in order to get a perfect exposure.
Why shoot in manual?
Wouldn’t it just be easier to shoot in automatic? It would! But shooting in automatic is unreliable. You’re handing over all your creative control to your camera and you will never know what your images will end up looking like. Arguably the most fun part of photography is getting to be creative!
Until next time,
Randi Idelle
Apr 23, 2022
How to take professional photos at home 2
